

How to build slides from a lesson
Upload your own slides as a PDF, or let Knola turn a lesson into designed slides in your brand, with what to say on each one.

 By Knola4 min read
A lesson's Slides are what students can page through. Bring your own as a PDF, or let Knola read the lesson, plan the slides, write what to say over each one and lay them out in your school's look. Either way you can present them, give them to students, download them, or turn them into a narrated video.
Already have slides? Upload a PDF
On the lesson, go to Slides and click Upload a PDF. Each page becomes a slide, up to 80 pages, and no credits are used. The section then names the file the slides came from.
On an empty lesson, choose Upload a file and drop the PDF there. A slide deck becomes the lesson's slides; any other PDF is shown in the lesson for students to read.
Export your slides from PowerPoint, Keynote or Google Slides as a PDF first. Later, the ⋯ menu on the slides has Replace with a new PDF, and Show as reading instead if you would rather students read the PDF than page through it.
Or let Knola make them with a new lesson
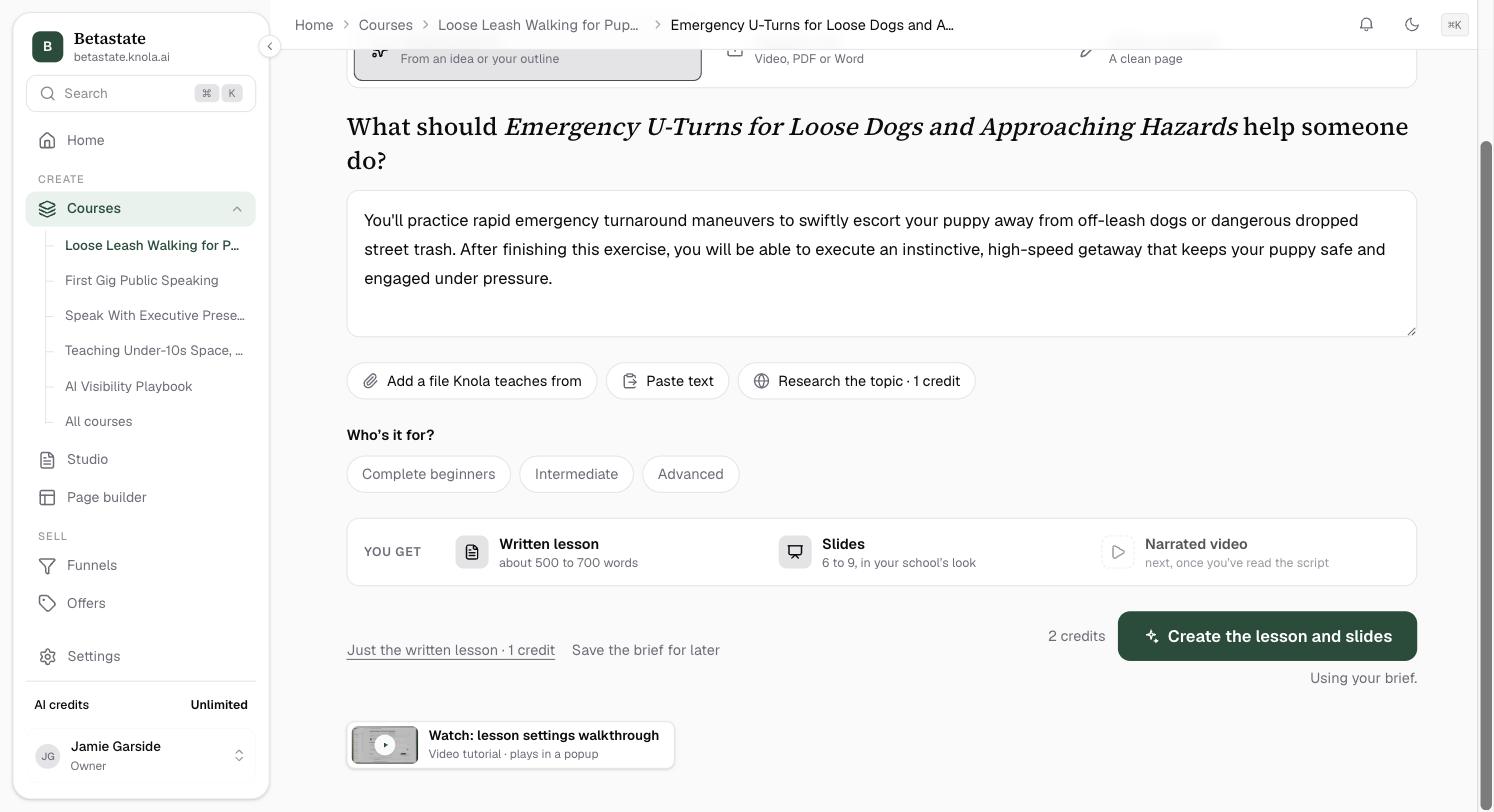
On an empty lesson, Create with AI makes the slides along with the written lesson. Write the brief, then click Create the lesson and slides. The full walkthrough is in How to create a lesson with AI.
Or from a lesson you already have
If the lesson already has a video or a written lesson, go to Slides and click Make slides with AI. The button shows its price. Knola builds the slides from what the lesson already says, right there on the page.
Choose how it looks while it builds
While Knola writes the slides and what you'll say on each, it offers a choice: "While you wait, pick how the slides look". You can change it any time on the slides. It takes about a minute; keep the page open until the slides are ready.
When they land
The slides appear in the Slides section of the lesson, with three buttons underneath:
- Edit slides: words, pictures, layout, or ask Knola to improve one. See How to edit your slides.
- Present: present them yourself, live or while you record.
- Download: as a PDF, as PowerPoint or for Google Slides. See How to present and export your slides.
To turn them into a video, use Make one from your slides under Watch: Knola narrates each slide in the voice you choose. See How to make a narrated video.
Slides start private: the label on the right of the section says Only you see these. To let students click through them, see How to show your slides to students.
Can I use slides I already made?
Yes. Save them as a PDF and click Upload a PDF under Slides. Each page becomes a slide, up to 80 pages, and no credits are used.
Can I use the speaker notes from my PowerPoint?
Yes. After uploading the PDF, open ⋯ in the Slides section and choose Add speaker notes from PowerPoint, then pick the .pptx the PDF was saved from. You see each page with the note it will get before anything changes; hidden slides are skipped. The notes go into each slide’s What you’ll say, word for word, and your video uses them as written. The PowerPoint is read on your computer and never uploaded.
What does Knola build the slides from?
From the lesson: its written lesson, the transcript of its video, and any sources you added. It does not invent a different lesson; the slides teach what the lesson teaches.
Can I use the slides in Google Slides?
Yes. Choose Download ▸ Google Slides. You get a PowerPoint file: upload it to Google Drive and choose Open with ▸ Google Slides. See How to present and export your slides.
Do the slides use my branding?
Yes. Knola's slides take your logo, brand colour and fonts from your brand settings, and you can choose a different theme for each presentation.