

How to edit your school page: instructor, testimonials, social proof
Set your tagline and hero image, choose which courses list on your home, and switch on the instructor block, testimonials and learner count.

 By Knola4 min read
The School page editor is one screen that controls everything on your school home: the home content, which courses list, and the three social-proof sections. Each section appears on the public page only when it’s switched on and actually has content, so you can fill things in gradually without ever showing an empty box.
Open the School page editor
In your admin sidebar, go to Your site → School page. The top of the screen tells you what’s left to finish (“Finish your school home:”) and shows a Performance · last 30 days strip (school views, enrolments, and the views-to-enrol rate) so you can see whether changes here move the needle.
Set your tagline, banner and gallery
Under About you ("Your tagline, website, banner and gallery"), write your tagline (it appears in the hero and your share previews), add your website, and upload a Hero image: a wide banner; 1500×500 looks best. The Gallery below it takes up to 6 more images. Logo, colours and fonts are in your Brand kit, and the editor links you straight there.
Choose which courses appear
Under Courses on your home, tick the published courses you want listed on your school page. Anything unticked stays reachable by direct link and always visible to its enrolled students. It just doesn’t appear in the public grid.
Fill in the instructor block
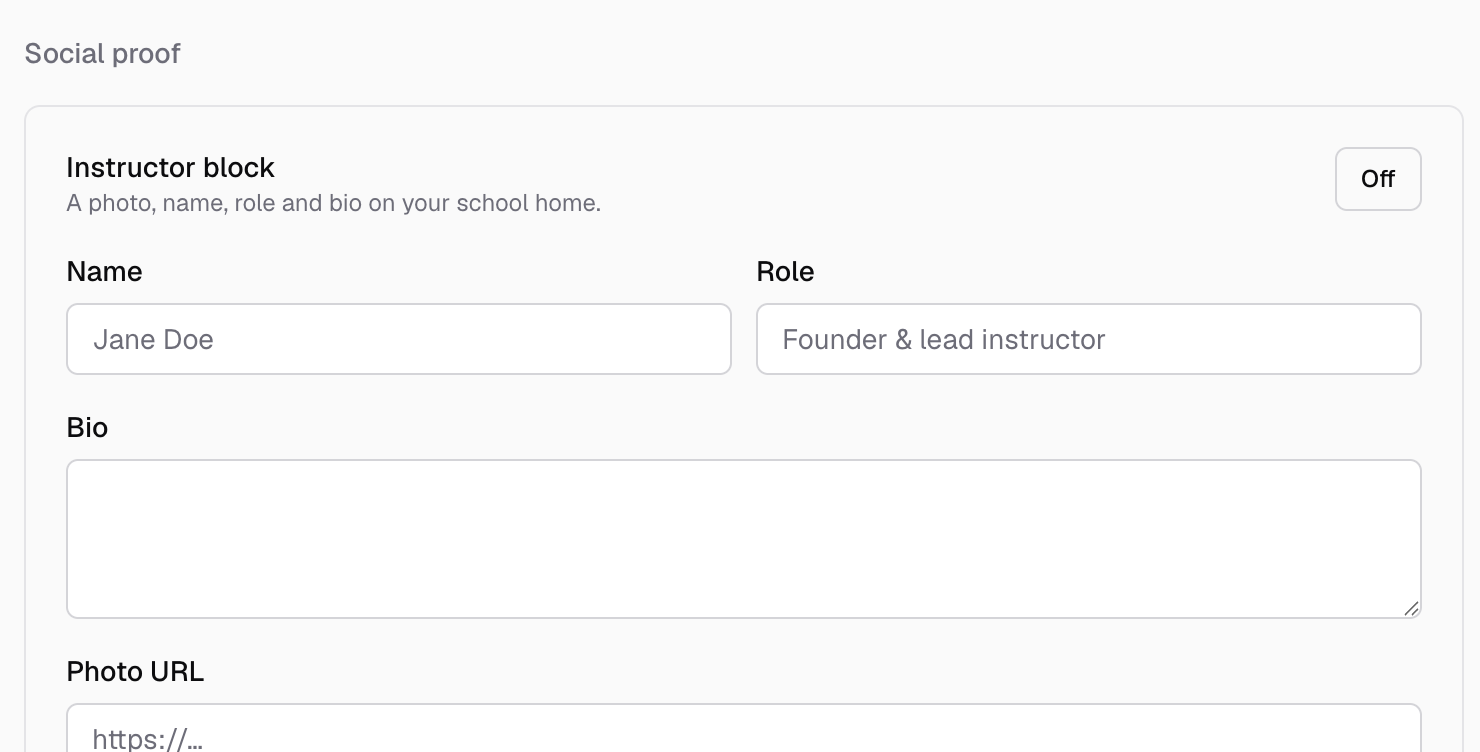
Under Social proof, the Instructor block section puts a photo, name, role and bio on your school home. Switch it On, then fill in Name, Role, Bio and Photo URL, and click Save instructor. People buy from people: a real face and a two-line bio outperform an anonymous school.
Add testimonials, real ones only
Switch Testimonials on, then use Add a testimonial: paste the Quote, add the Author, an optional Role (optional) and Rating, and an Avatar URL (optional), then click Add testimonial. Each saved testimonial can be edited (Edit), temporarily hidden (Hide / Show), or removed (Remove).
Check the live page
Open your school’s root URL in a private browser window to see exactly what a visitor sees. The signed-out view differs from yours as a member. Every section you switched on with content should now be visible; anything empty stays invisible.
How do I add testimonials to my Knola school?
On Your site → School page, switch Testimonials on and use the Add a testimonial form: quote, author, optional role, rating and avatar. They appear under “What learners say” on your school home.
Why isn’t my instructor block showing on the page?
It appears only when the Instructor block toggle is on AND you’ve saved at least a name or bio, and it shows to visitors, not to signed-in students. Check both, then view the page in a private window.
Can I reorder the sections on my school home page?
No. The order is fixed (hero, courses, testimonials, instructor, email capture). You control which sections appear and what they contain.
Switch on the learner count
The Social proof toggle shows “Trusted by N learners” on your home page, counted from your real enrolments. There’s no number to type and nothing to keep updated. It stays hidden until you have students, then grows on its own.