

Set up your email domain
Connect your own email domain, add its records in one click or by hand, and fill in your sender details so your broadcasts and flows can send.

 By Knola10 min read
Your broadcasts and flows go out from your own address, like [email protected], with your name on them. They arrive from your school, not from Knola, and the sending reputation you build is yours alone: no other school’s email can drag it down.
Three things stand between you and your first send: a verified email domain, an inbox for replies, and a postal address for the footer. This guide walks through all three on one page, Settings ▸ Email.
Open Settings ▸ Email
In your admin, click Settings in the sidebar, then Email. The page opens on Before you can send, a short checklist with a count such as "0 of 3 done": Connect your email domain, Choose where replies go and Add your postal address.
Each unfinished line has a link (Set it up or Add it, and Check it once your domain is added) that jumps to its section further down the page. The lines tick themselves off as you go.
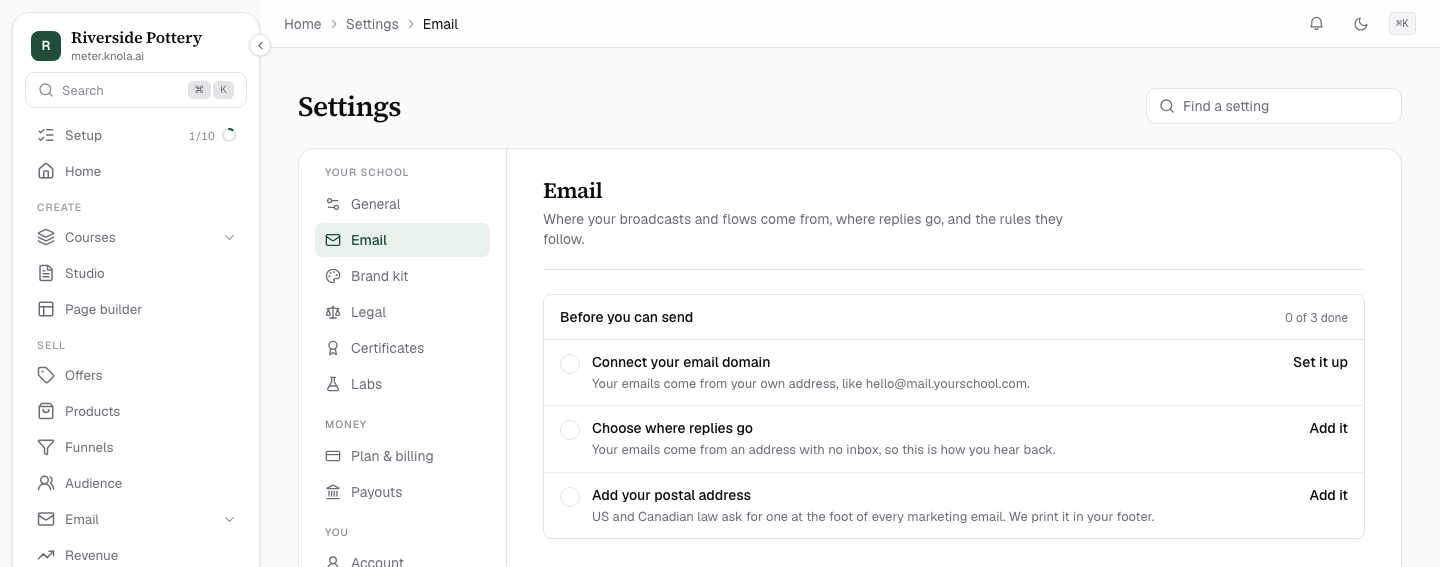
Type the address you’ll send from
Under Email domain, type the address into Address to send from and click Set up. Use a subdomain of a domain you own, such as mail.yourschool.com: a short word in front of your main web address.
Knola only accepts a subdomain. If you type your main domain, it asks you to add one in front, because sending from a subdomain keeps your website and everyday inbox safe if a send ever lands badly. Your emails then come from hello@ on that address, for example [email protected].
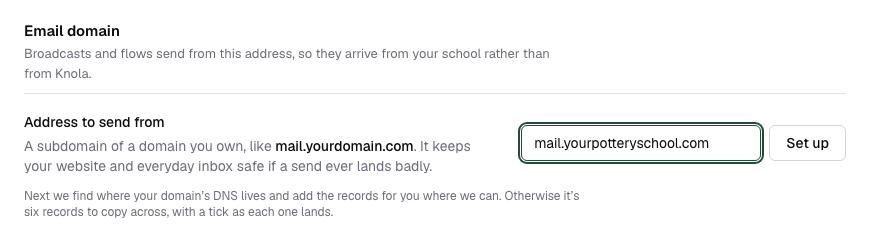
Choose how to add the records
Knola now shows a card for your domain with a progress line (Domain added, then "Add 6 records · 0 of 6", then Verified) and the status Waiting for your records.
To prove the address is yours, six small entries called DNS records need adding wherever your domain is managed. That is usually the company you bought the domain from, and Knola works out which company it is for you. You have up to three ways to add them:
- One click: if your DNS provider supports it, you approve the records on its own site. Cloudflare does.
- Let Knola add them: on Cloudflare you can paste a key instead, and Knola adds all six at once.
- Copy them yourself: works with every provider.
When a quicker way exists, a switch above the records offers it next to I’ll copy them myself. On Cloudflare it reads Add with Cloudflare.
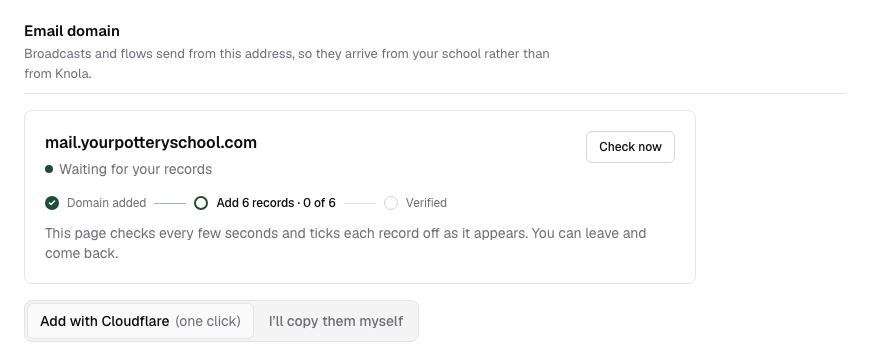
One click: approve the records at your provider
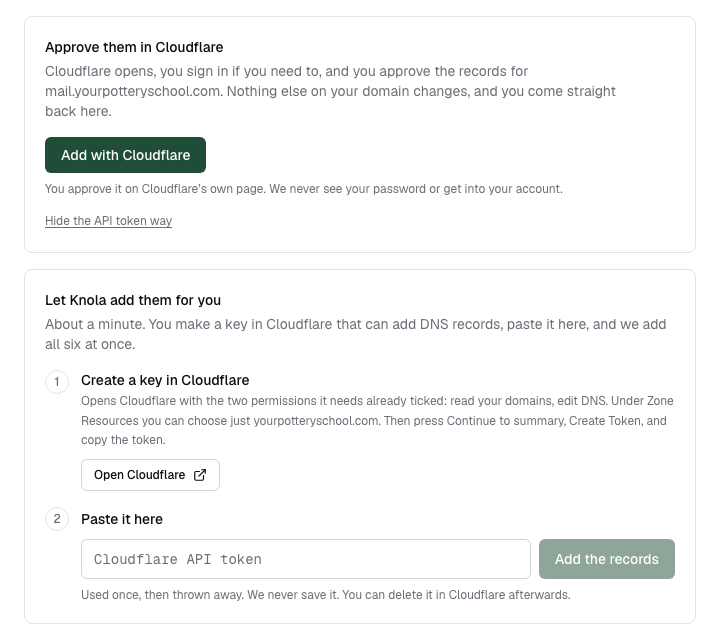
Choose Add with Cloudflare (or your provider’s name), read the Approve them in Cloudflare card and click the button. Your provider’s site opens in the same tab. Sign in if it asks, check the domain, and approve.
You approve it on your provider’s own page, so Knola never sees your password or gets into your account, and nothing else on your domain changes. You land back on Settings ▸ Email with the note Back from Cloudflare. Checking your records now. and the records start ticking off.
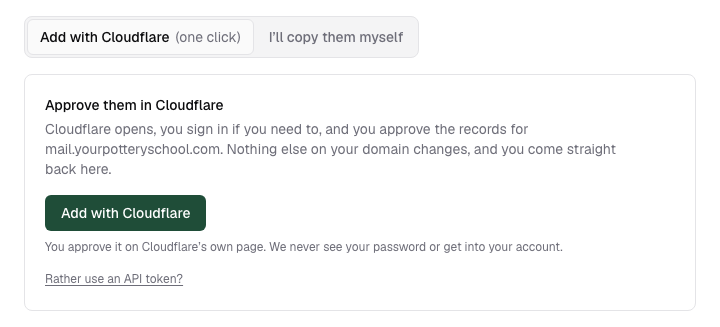
Or let Knola add them with a Cloudflare key
If your DNS is at Cloudflare and you would rather not sign in there from this page, click Rather use an API token? under the one-click card. (If one-click isn’t offered, choose Add them for me instead.) The Let Knola add them for you card takes about a minute:
- Click Open Cloudflare. Cloudflare opens with the two permissions the key needs already ticked: read your domains and edit DNS. You can limit it to just your domain.
- In Cloudflare, press "Continue to summary", then "Create Token", and copy the token it shows you.
- Back in Knola, paste it under Paste it here and click Add the records.
Knola adds all six records and tells you how many it added, for example "Added 6 records". The key is used once and thrown away: Knola never saves it, and you can delete it in Cloudflare afterwards.
Or copy the records yourself
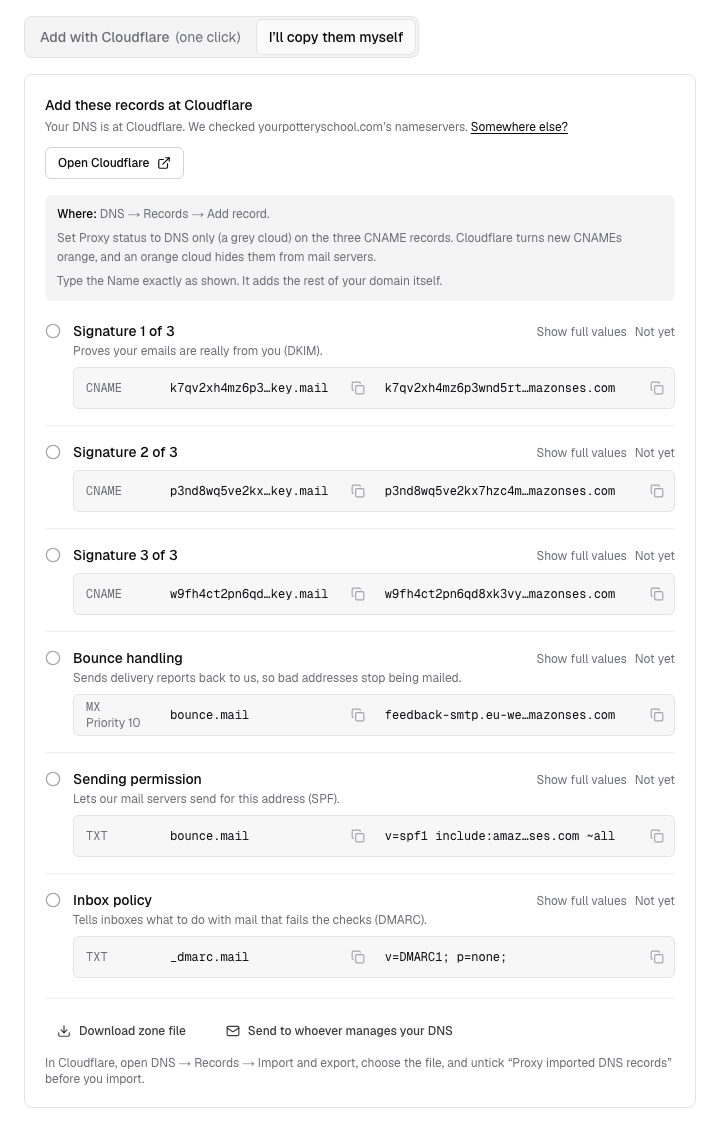
Choose I’ll copy them myself. The card is titled for your provider, such as Add these records at Cloudflare, and says where to go there (for Cloudflare, "DNS → Records → Add record"). Use Open Cloudflare to go straight to that screen. If Knola guessed the wrong company, click Somewhere else? and pick yours under My DNS is at.
Add each record as a new entry at your provider:
- Signature 1 of 3, Signature 2 of 3 and Signature 3 of 3: prove your emails are really from you.
- Bounce handling: sends delivery reports back, so bad addresses stop being mailed.
- Sending permission: lets Knola’s mail servers send for this address.
- Inbox policy: tells inboxes what to do with mail that fails the checks.
Every record has a Type (CNAME, MX or TXT: the kind of record you pick from your provider’s list), a Name (where it goes) and a Value (what it says). Bounce handling also has a Priority. Click any box to copy it; it shows Copied. Type the Name exactly as shown, because most providers add the rest of your domain for you. On a wide screen, Show full values lays each one out in separate boxes.
Someone else looks after your domain? Click Send to whoever manages your DNS, then Copy message or Open in email to send them every record with instructions. Download zone file gives you a file that some providers can import in one go.
Wait for "Verified"
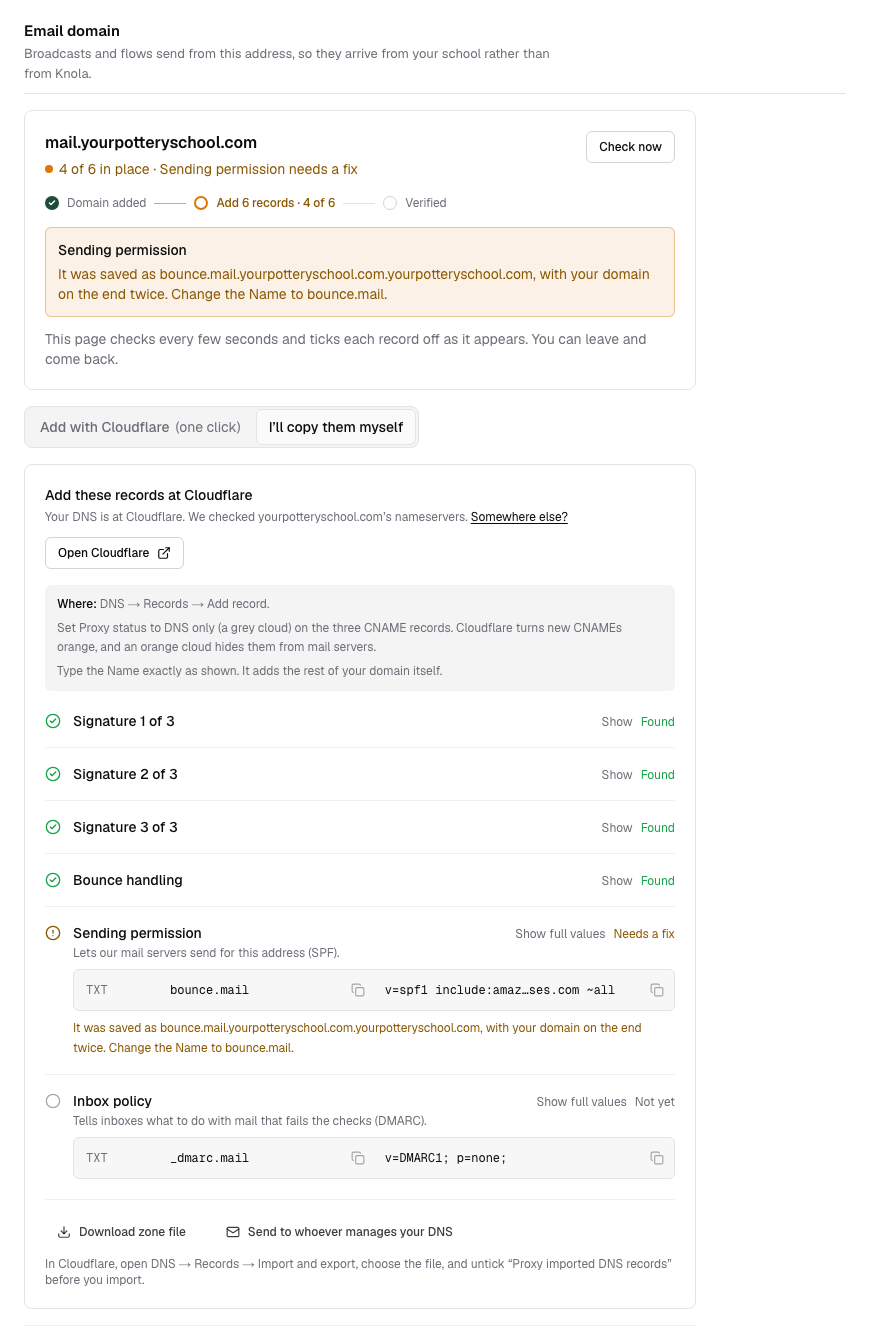
The card checks every few seconds and ticks each record off as it appears, so you can watch it fill in or leave and come back. Verification usually finishes within an hour of adding the records, and occasionally takes up to 48 hours. Check now checks straight away.
Each record shows where it stands: Found, Not yet, Needs a fix or Couldn’t check. A record that needs a fix says exactly what to change, for example a Name saved with your domain on the end twice. Where a value is wrong, the right one sits beside the message, ready to copy. The status line follows along: "2 of 6 in place", then All records in place, confirming while the final confirmation comes through.
Already have an inbox policy on your main domain? Knola spots it and the Inbox policy row reads "Covered by the DMARC policy on yourschool.com. Nothing to add here." Knola never adds a second one, so a policy you set stays in charge.
Once it passes, the card reads Sending from [email protected] with Verified and the date, and a button for your next step.
Choose where replies go and your From name
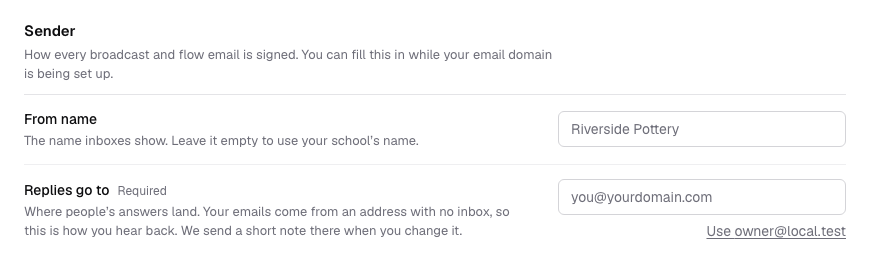
Scroll to Sender. You can fill this in while your domain is still verifying.
- Replies go to (Required): the inbox you actually read. Your emails come from an address with no inbox, so this is how you hear back. The "Use" link with your sign-in address under the field fills it in for you. It can’t be an address on your new email domain, or a Knola address.
- From name: the name inboxes show. Leave it empty to use your school’s name. Use a name, not an email address.
Both save when you click out of the field. When you set Replies go to, Knola sends a short note to that address, so a typo shows up as a note that never arrives.
Add your postal address
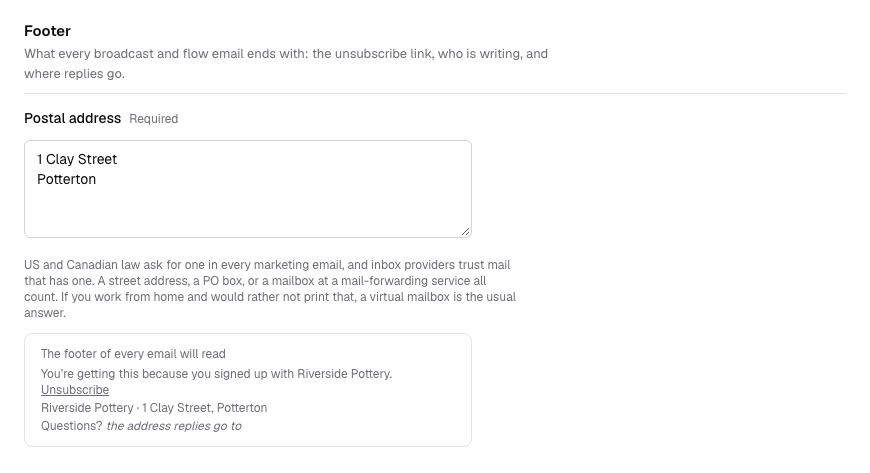
Under Footer, type your address into Postal address (Required). US and Canadian law ask for one in every marketing email, and inbox providers trust mail that has one. A street address, a PO box or a mailbox at a mail-forwarding service all count, so if you work from home a virtual mailbox is the usual answer.
It saves when you click out of the box, and a preview shows how the footer of every email will read. Once your domain is verified and both sender details are in, the checklist at the top becomes one line: Ready to send. with the address your emails come from and where replies go.
Leave the records in place
Keep the six records for as long as you send. Inboxes check them on every email, so Knola checks them again every day. If any go missing, for example after you move your domain to a new provider or tidy up old records, the card shows Needs attention and names the records to put back. Broadcasts can’t go out and flow emails wait until they pass again.
Re-add the records exactly as shown and click Check now. Knola also picks up the fix on its next daily check, so sending starts again by itself.
To stop sending from this domain or switch to another, use Remove this email domain at the bottom of the card: click Remove, then Yes, remove. Broadcasts and flows stop until you connect a domain again.
Can I send email before my domain is verified?
Only test emails to yourself. Email me a test in a broadcast or flow sends to you from Knola’s address so you can read your email on day one. Tests to teammates, broadcasts and flows wait until your domain shows Verified, and you can fill in where replies go and your postal address in the meantime.
Why does Knola need my own domain to send email?
So your email comes from you and your reputation is yours alone. Readers see your school’s name and address, and whether your mail lands in the inbox depends only on how you send, never on another school. Using a subdomain like mail.yourschool.com keeps your main website and everyday inbox out of it.
My domain is stuck on verifying, what do I do?
Look at the record list on the card. Any row marked Needs a fix says exactly what to change. On Cloudflare, the usual cause is an orange cloud on the three CNAME records: switch them to DNS only. If every row says Found, the last confirmation is still coming through: it usually takes under an hour and occasionally up to 48 hours. Click Check now to check again at any time.
Which DNS provider do I need?
Any. Knola works out where your domain’s DNS is managed (usually where you bought it) and shows the steps for that provider. Where the provider supports one-click setup, as Cloudflare does, you can approve the records there in one go; everywhere else you copy six records across, with a tick as each one lands.
Will this affect my normal email on my main domain?
No. All six records sit on your sending subdomain, such as mail.yourschool.com, so nothing on your main domain changes and your everyday Gmail or Outlook inbox carries on as before. If your main domain already has an inbox policy, Knola leaves it in charge and doesn’t add one of its own.