

How to attach lesson resources: downloads, links, code and books
Attach the extras to any lesson: downloadable files, external links, embedded videos, copyable code and book recommendations, in the order you choose.

 By Knola4 min read
Resources is a row in Extras, near the foot of the lesson page: "Worksheets, checklists or links for students to keep." Once it holds something, it reads "What students can download from this lesson." Whatever you attach there, learners see at the bottom of the lesson, and beside the video, in the rail next to the transcript.
Add a resource and pick its type
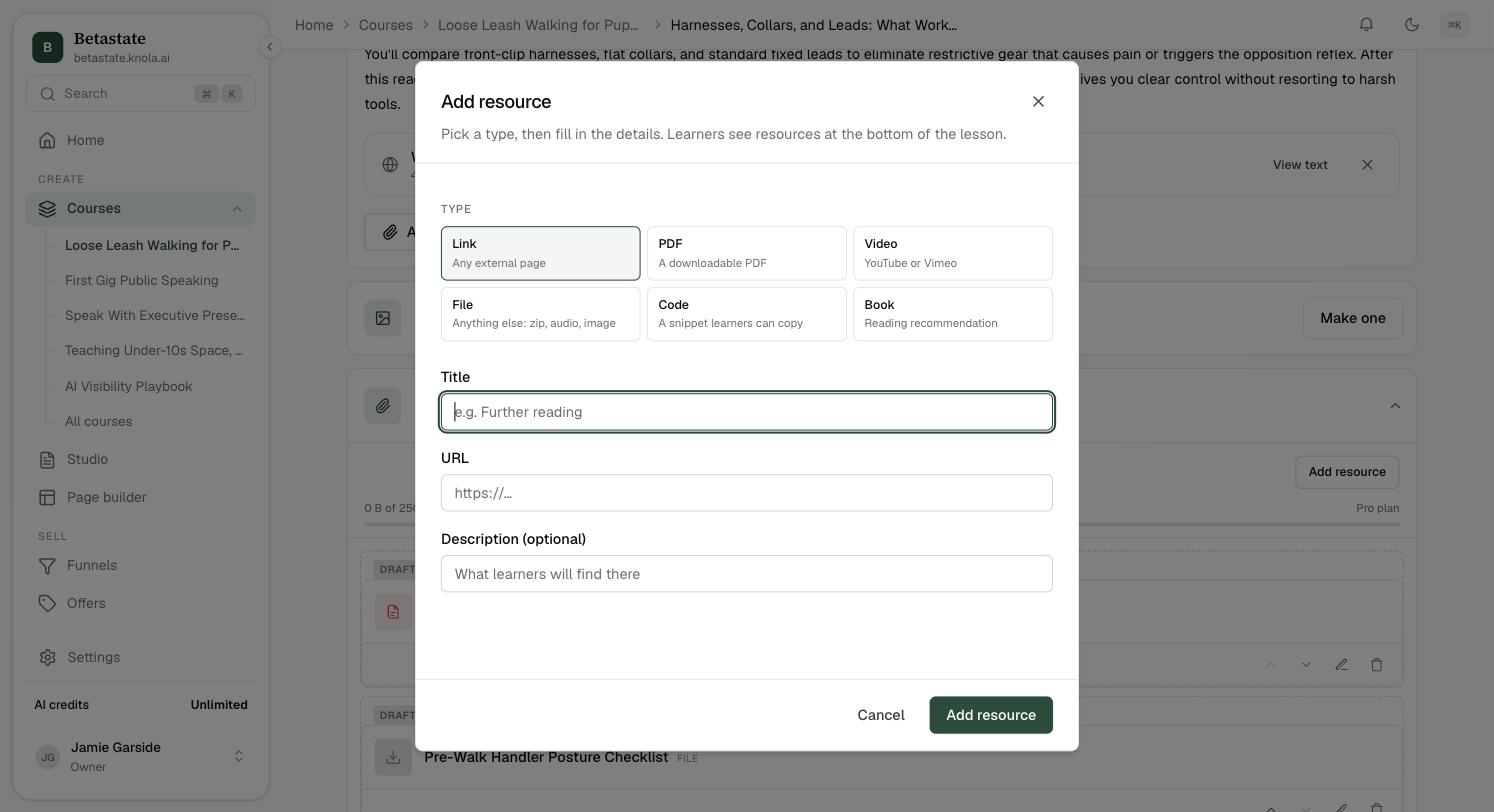
Open the Resources row and click Add resource. The Add resource dialog opens on a type picker: "Pick a type, then fill in the details." The six types:
- Link: "Any external page".
- PDF: "A downloadable PDF".
- Video: "YouTube or Vimeo".
- File: "Anything else — zip, audio, image".
- Code: "A snippet learners can copy".
- Book: "Reading recommendation".
Fill in the details
Every resource gets a Title; the remaining fields follow the type. A Link takes a URL and an optional description. A Video takes a YouTube or Vimeo URL. Code takes a Language and the code itself. Book takes an Author, a Cover image URL and a Buy / details URL.
For PDF and File, either upload ("Drop a file here, or click to upload", up to 100 MB per file) or click Paste a URL instead to point at a file hosted elsewhere. Save with Add resource.
Reorder, edit and delete
Each resource card carries up and down arrows (learners see them in this order), an Edit button that reopens the dialog, and Delete, confirmed with "Remove this resource? Learners will no longer see it on this lesson."
Resources in the Students get row at the top of the lesson counts only what students actually get. Suggestions Knola made that you have not filled in yet are counted there as drafts, and stay hidden from students.
Add one resource to every lesson at once
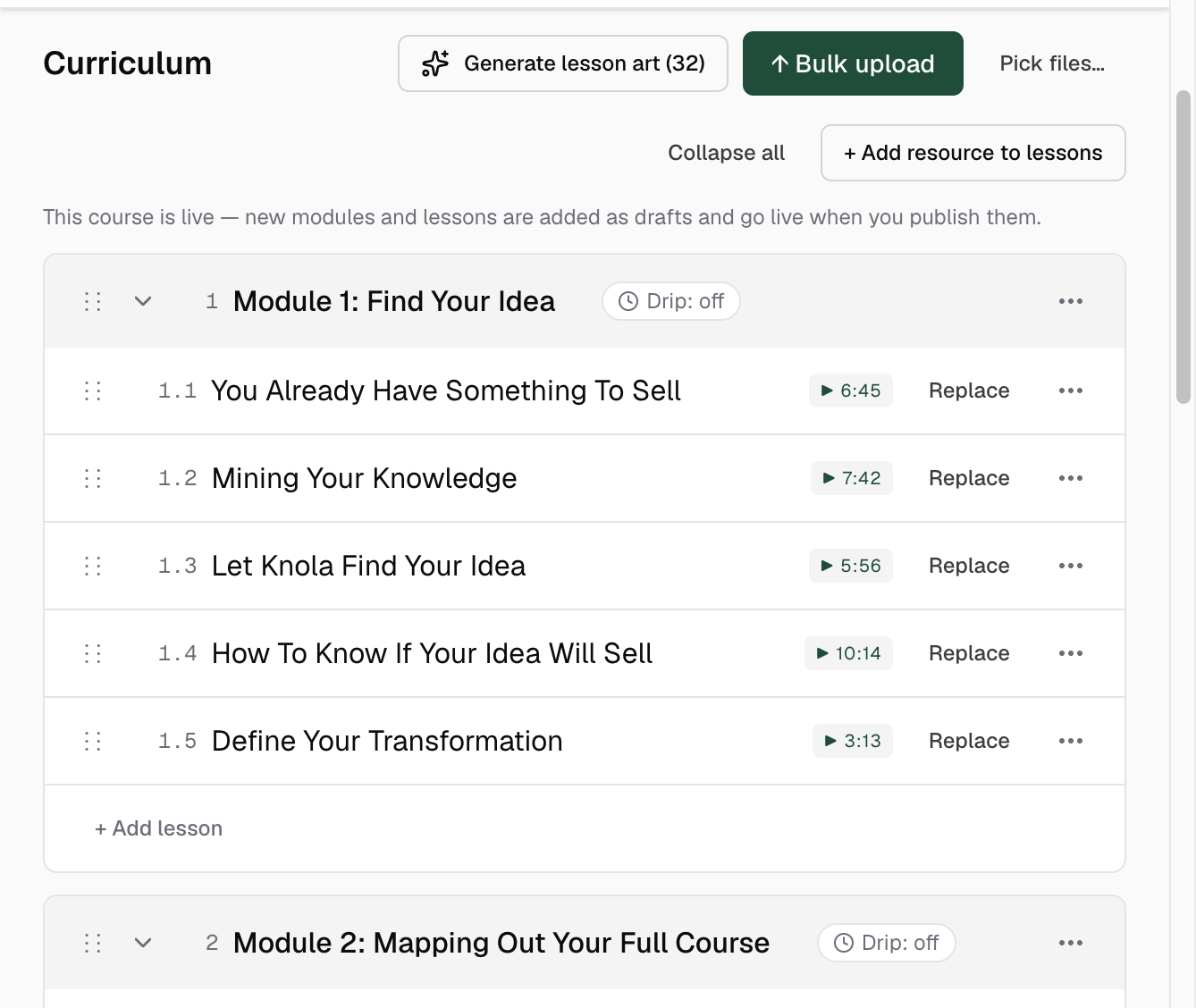
Some resources belong on every lesson: a workbook, a community link, a contact sheet. You don't have to attach those one lesson at a time. On the course page, at the top of the Curriculum section, click + Add resource to lessons. The same Add resource dialog opens, and whatever you add there is attached to every lesson in the course in one go.
Keep an eye on the storage meter
At the top of the open Resources row, a meter shows your school’s storage: how much is used of your plan’s allowance, with the plan name beside it. Uploaded files (and lesson-body documents) count toward it; links, code, books and pasted URLs cost nothing. The bar turns amber as you approach the limit and red when you’re over.
Where do students see lesson resources?
At the bottom of the lesson, and in the Resources tab beside the video player. They appear in the order you set with the move arrows.
How big can an uploaded resource file be?
Up to 100 MB per file: PDF, ZIP, image, audio and similar. For anything larger, host it elsewhere and attach it with Paste a URL instead.
Do resources count against my storage?
Only uploaded files do. Links, embedded videos, code snippets, book recommendations and URL-based files use none. The meter at the top of the Resources panel shows exactly where you stand against your plan’s allowance.