How to build your first course, end to end
The whole journey on one page: create the course, fill the lessons, set the price, publish, and put it in front of students, with a deeper guide at every step.

 By Knola4 min read
This is the map, not the terrain: five stages from empty school to a course someone can buy. Each stage is a couple of minutes here, with a link to the guide that covers it properly. Most creators get from start to published inside a day. The teaching content is the only part that takes as long as it takes.
Create the course: AI draft or blank
Go to Courses and press New course. Describe what you teach and press Draft my course. Knola drafts the modules, lessons, name options and a suggested price, all editable before anything is created. Press Create course, offer & funnel and you get all three wired together. Prefer full control? The same screen offers Prefer to start blank? Create a course manually.
The full walkthrough of the draft studio is in Create a course with AI.
Starting blank: add your first module and lesson
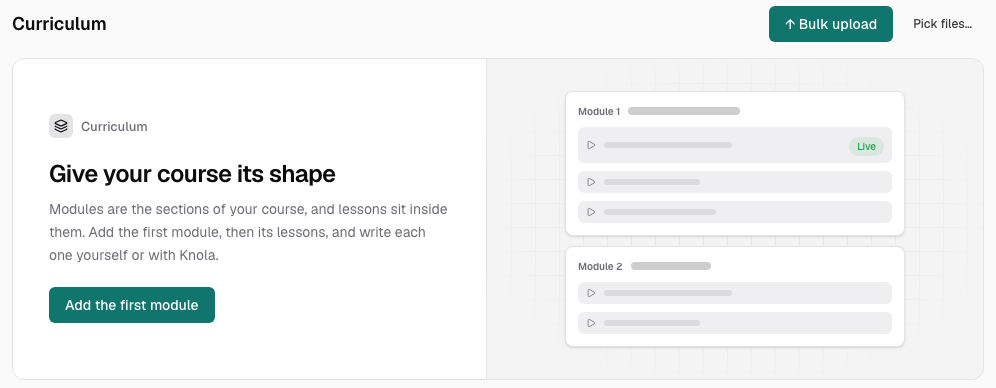
A blank course opens with an empty Curriculum that says "Give your course its shape". Build it one step at a time:
- Click Add the first module, type the module's name and press Enter. The field stays open, so you can type every module name in one go; press Esc when you're done.
- Under a module, click + Add lesson, type the lesson's name and press Enter. Again, keep typing to add the next one.
- Click a lesson's title to open it, then write the lesson, paste it in, or upload a file to it.
Everything about arranging modules and lessons afterwards, including dragging them into order, is in How to build your curriculum.
Fill the lessons
Open your course and work down the Curriculum. Each lesson opens on three ways in: Create with AI writes the lesson and its slides from a short brief, Upload a file takes your own video, PDF or Word document, and Write it yourself is a clean page. Bulk upload on the curriculum header takes a whole folder of videos at once.
Once a lesson has slides, Knola can turn them into a narrated video in the voice you choose, with no recording. See How to create a lesson with AI and How to make a narrated video.
Everything on the lesson page is in Here's how the lesson page works.
Set the price and connect your checkout
The details strip at the top of the course page shows everything at a glance: price, visibility, and how buyers pay. Press Edit details to set your price ($0 makes it free). To take payment through Knola, connect Stripe under Settings. Payouts go straight to your own Stripe account.
Step by step in Connect Stripe, or skip Stripe entirely and use your own payment processor with a 0% platform fee.
Publish
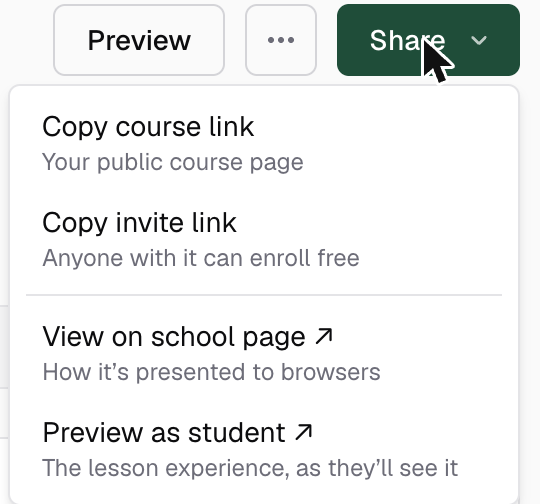
Press Publish in the course header. If lessons have narrated videos or slides waiting, Knola tells you it will put those live too. The status pill flips from Draft to Published, the course goes live on your school page, and the primary button becomes Share. Until then, Preview shows you the course exactly as a student will see it.
Visibility options (listing, featuring, unpublishing) are covered in Publish and share your course.
Do I have to use the AI to create a course on Knola?
No. New course offers both paths: describe what you teach for a full AI draft, or choose Prefer to start blank? Create a course manually and build every module yourself.
Can I publish a course before every lesson is finished?
Yes, and it's often the right move. Publish when the first module is genuinely useful; students see the course as it grows and your early buyers tell you what to build next.
How do students pay me?
Two ways: connect Stripe and Knola runs the checkout, payments and enrolment automatically, or point your course at any external checkout link and deliver access with an invite link, with no platform fee.