Here's every course setting: title, price, cover, visibility
Where every course-level control lives: rename, publish state, school-page visibility, price and checkout method, cover image, exports and preview.

 By Knola5 min read
A course's settings aren't on a separate settings page. They live on the course page itself: the header, the details strip beneath it, the Course features block, and the ⋯ menu. This guide maps them all.
The header: name and visibility
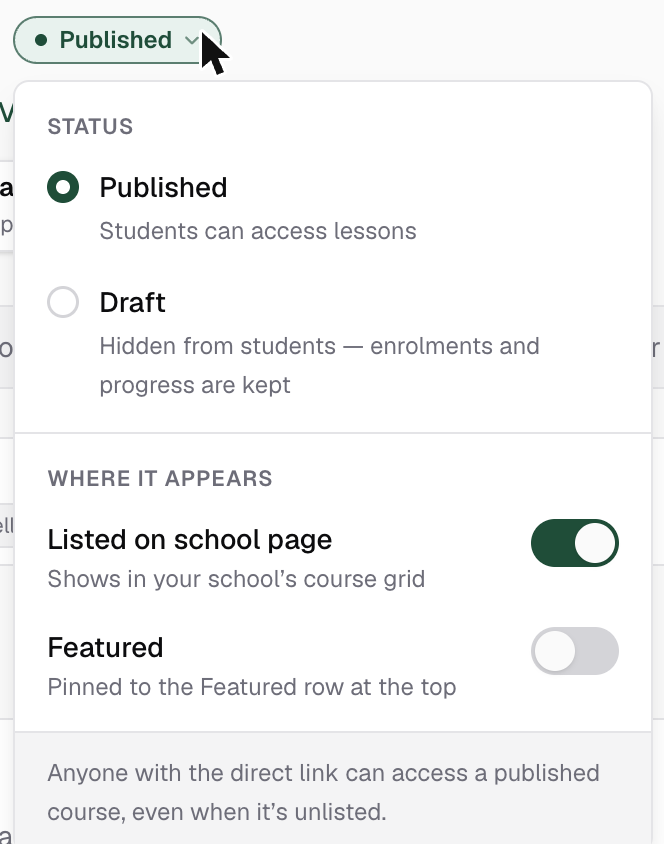
Click the course title to rename it in place. Next to the title sits the status pill (Published or Draft), and clicking it opens the one visibility control for the course:
- Status: Published ("Students can access lessons") or Draft ("Hidden from students — enrolments and progress are kept").
- Listed on school page: whether the course shows in your school's course grid.
- Featured: pins the course to the Featured row at the top of your school page.
The details strip: everything at a glance
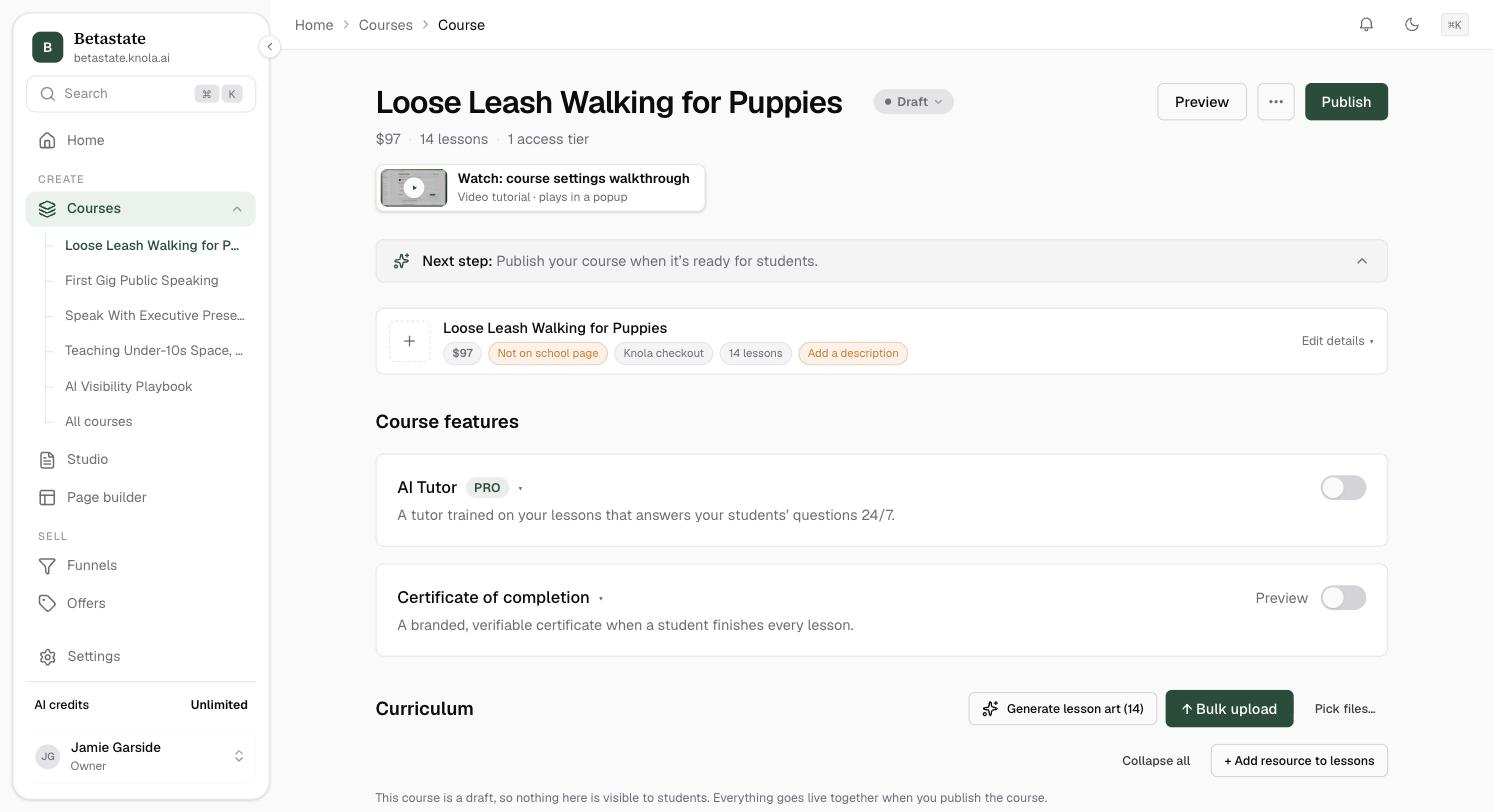
Under the header, a slim strip shows everything at a glance: the price, whether the course is on your school page, how buyers pay, and the lesson count. Click Edit details on its right to expand it.
Course features: AI Tutor and certificates
Under the details strip, Course features holds two switches for the whole course:
- AI Tutor (Knola Pro): "A tutor trained on your lessons that answers your students' questions 24/7." See How to give every course a teaching assistant.
- Certificate of completion: "A branded, verifiable certificate when a student finishes every lesson." Preview shows the certificate. See How to enable completion certificates.
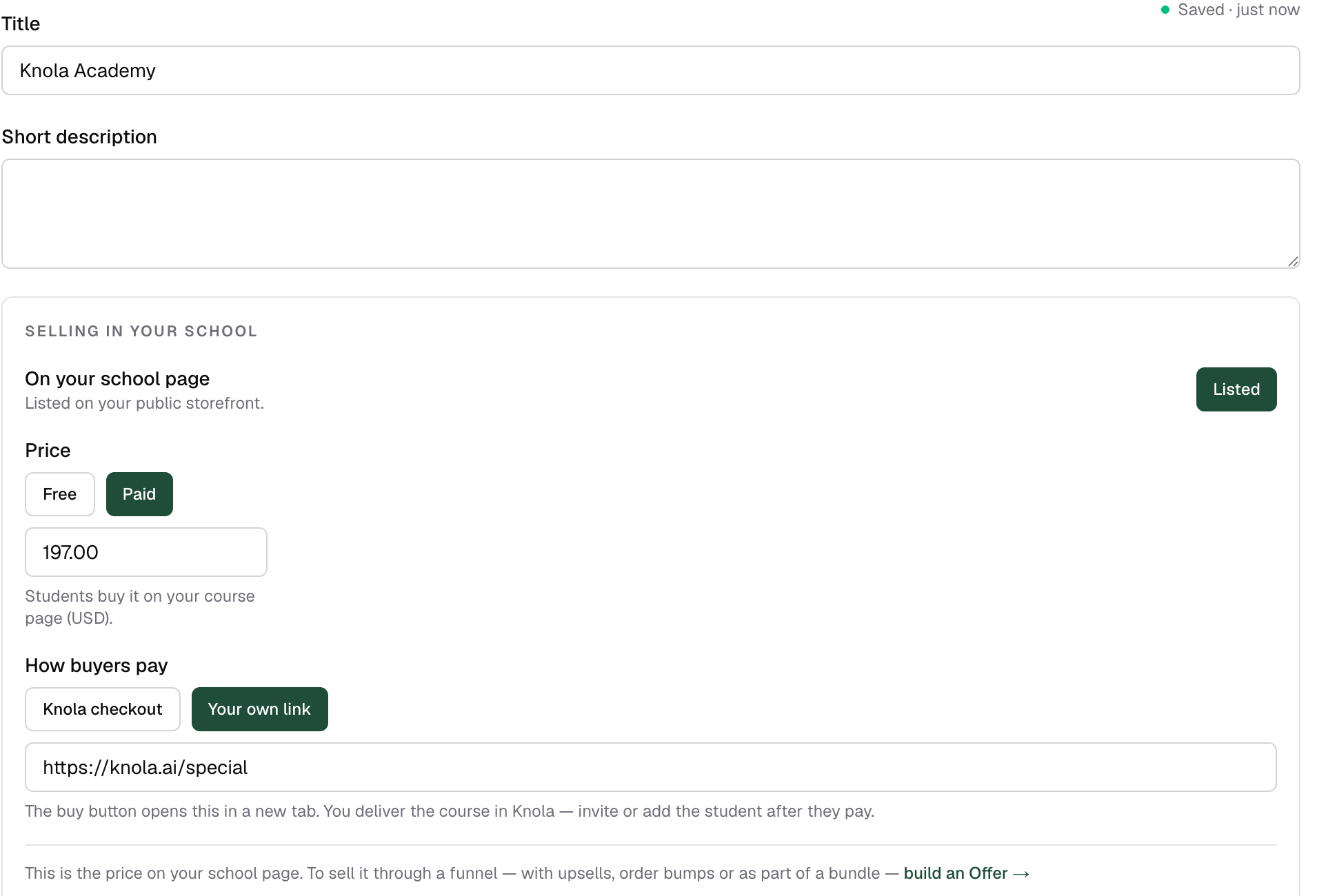
Edit details: description, price and checkout
The expanded panel holds the course basics. Everything in here autosaves as you type.
- Title and Short description: the description appears wherever the course is presented, so a missing one gets an "Add a description" nudge on the strip.
- On your school page: a Listed / Hidden toggle; hidden courses are shared by direct link or sold through a funnel.
- Price: Free or Paid. Free means anyone can enrol from your course page, no Stripe needed. Paid shows a USD price field.
- How buyers pay: Knola checkout (Stripe, automated delivery) or Your own link (paste any checkout URL; see Use your own payment processor). The strip's chip flips to Sells via your own link when you do.
The cover image: uploaded or AI-generated
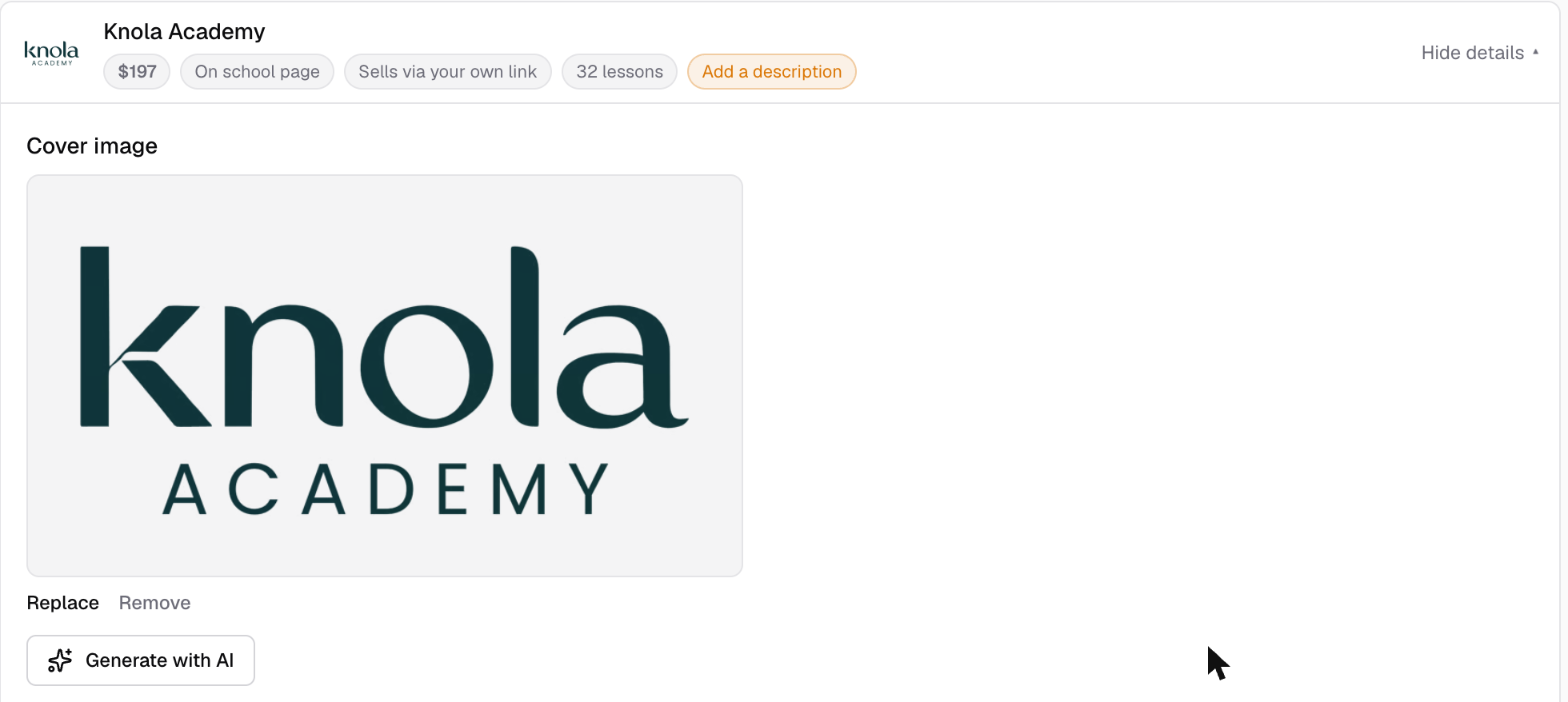
The cover shows on the course catalog and the lesson reader; 16:9 looks best. Upload your own under Cover image, or click Generate with AI, both covered step by step in course covers: your course title is designed into the image itself, and you can optionally describe the scene behind it, or leave it blank and Knola designs one from your course. Click Use as cover when a variant lands, or tweak the scene and Regenerate.
The ⋯ menu: exports, tiers and deletion
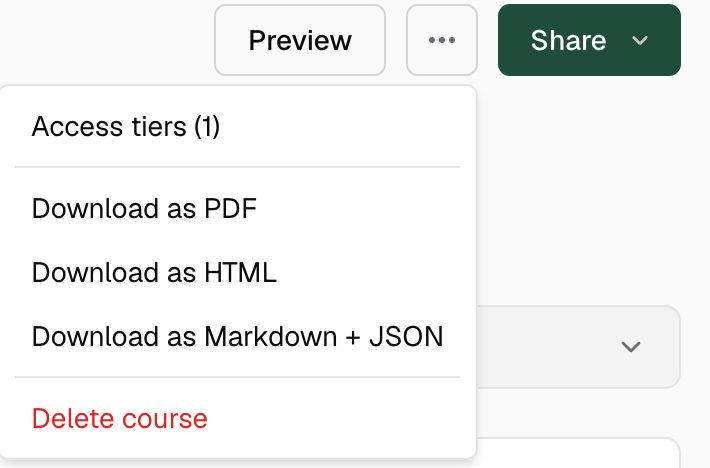
The ⋯ button next to Preview holds the rest:
- Access tiers: sell slices of the course as tiers.
- Download as PDF, Download as HTML, Download as Markdown + JSON: your content is always exportable.
- Delete course: permanent, removes modules, lessons and all student progress; you type DELETE to confirm.
Preview opens the public course page in a new tab any time. Once published, the primary button becomes Share, with Copy course link, Copy invite link, View on school page ↗ and Preview as student ↗, covered in Publish, preview and share.
How do I make my course free?
Open Edit details on the course page and set Price to Free. Anyone can then enrol from your course page. No Stripe connection needed.
Can I download my course content out of Knola?
Yes. The ⋯ menu on every course offers Download as PDF, Download as HTML and Download as Markdown + JSON. See Your content.
Does the AI cover put text on the image?
Yes. Your exact course title is designed into the image as its typographic centrepiece, and each generation is checked so a misspelled title is never shown to you.